If you’re a product owner or a software engineer, you are very likely to know the importance of measuring the performance and understanding how users use your web app. To do so, you need to integrate Google Analytics into your web app.
Google Analytics is the leading solution for understanding how your users are interacting with your website and app. With Google Analytics, you can track website user behavior and page performance, measure the success of marketing campaigns, and identify trends. You can see which pages are popular, which source of traffic is driving the most engagement, and much more. This data can help you make informed decisions on how to improve your app.
In this article, I’m going to show you how to add Google Analytics to your Next.js app, step by step.
The Steps
Get Google Analytics tracking ID
The first step in adding Google Analytics to your Next.js app is to set up a Google Analytics account. To do this, head over to analytics.google.com and click on Sign up.
Once you’ve signed up for Google Analytics, you’ll need to create a property for your app. To do this, click on the Create Property button and enter your app’s name.
Once you’ve created the property, you’ll be given a tracking ID. Go to Your Property > Data Streams > Web to obtain it. A Google Analytics tracking ID will look similar to this: G-ABCDEFGHIJK.
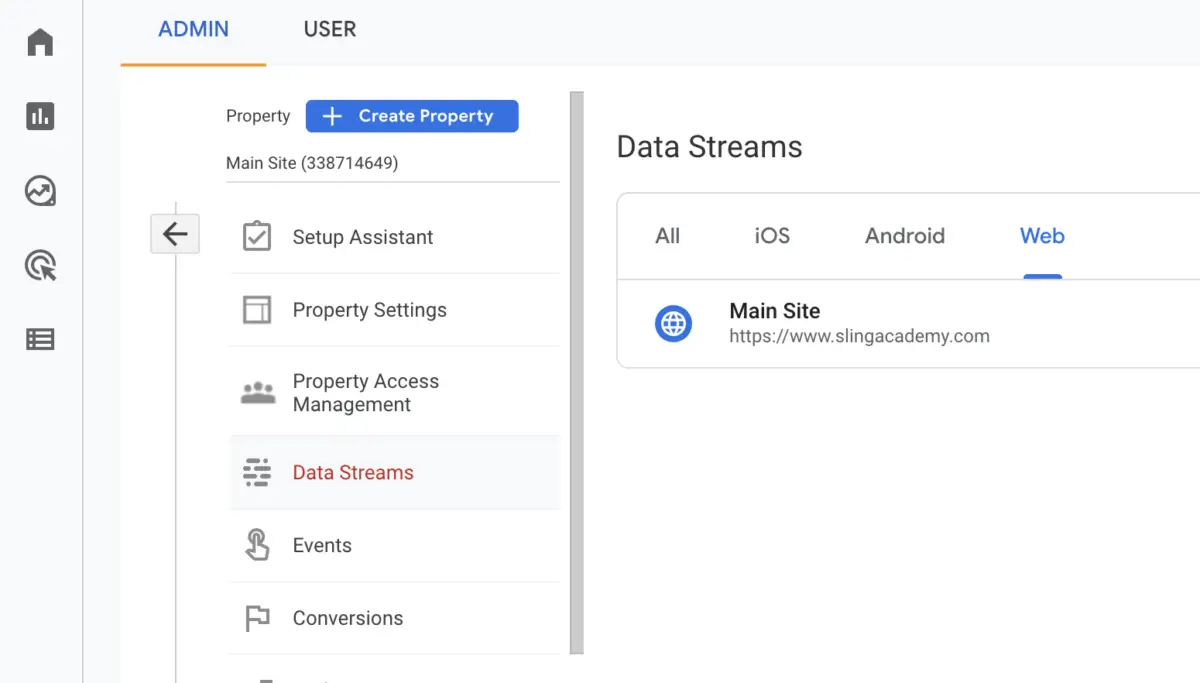
This tracking ID is unique to your app and will be used to track user engagement. Make sure to save this tracking ID, as you’ll need it in the next step.
Setting Up the Tracking Code
Now that you’ve set up your Google Analytics account and created a property for your app, you’ll need to add the tracking code to your Next.js app. To do this, open your pages/_app.js file in your code editor and update it as follows:
// pages/_app.js
import '../styles/globals.css';
import NextScript from 'next/script';

export default function App({ Component, pageProps }) {
  return (
    <>
      {/* Google Analytics tracking code here */}
      {process.env.NODE_ENV === 'production' && (
        <>
          <NextScript
            src='https://www.googletagmanager.com/gtag/js?id=G-ABCDEFGHIJK'
            strategy='afterInteractive'
          />
          <NextScript id='google-analytics' strategy='afterInteractive'>
            {`
            window.dataLayer = window.dataLayer || [];
            function gtag(){window.dataLayer.push(arguments);}
            gtag('js', new Date());
            gtag('config', 'G-ABCDEFGHIJK');
            `}
          </NextScript>
        </>
      )}
      {/* end Google Analytics tracking code */}

      <Component {...pageProps} />
    </>
  );
}
If you’re using TypeScript:
// pages/_app.tsx
import '../styles/globals.css';
import type { AppProps } from 'next/app';
import NextScript from 'next/script';

export default function App({ Component, pageProps }: AppProps) {
  return (
    <>
      {/* Google Analytics tracking code here */}
      {process.env.NODE_ENV === 'production' && (
       <>
          <NextScript
            src='https://www.googletagmanager.com/gtag/js?id=G-ABCDEFGHIJK'
            strategy='afterInteractive'
          />
          <NextScript id='google-analytics' strategy='afterInteractive'>
            {`
          window.dataLayer = window.dataLayer || [];
          function gtag(){window.dataLayer.push(arguments);}
          gtag('js', new Date());
          gtag('config', 'G-ABCDEFGHIJK');
        `}
         </NextScript>
       </>
     )}
     {/* end Google Analytics tracking code */}

     <Component {...pageProps} />
    </>
  );
}
Make sure to replace G-ABCDEFGHIJK with your actual app’s tracking ID. This code will initialize the Google Analytics tracking code and will track user engagement and page views for all routes of your Next.js app.
We added process.env.NODE_ENV === ‘production’, the environment checking logic, to ensure that Google Analytics will only track our app in production, not in development.
Now it’s time to build and deploy your Next.js application to production.
Viewing Your Data in Google Analytics
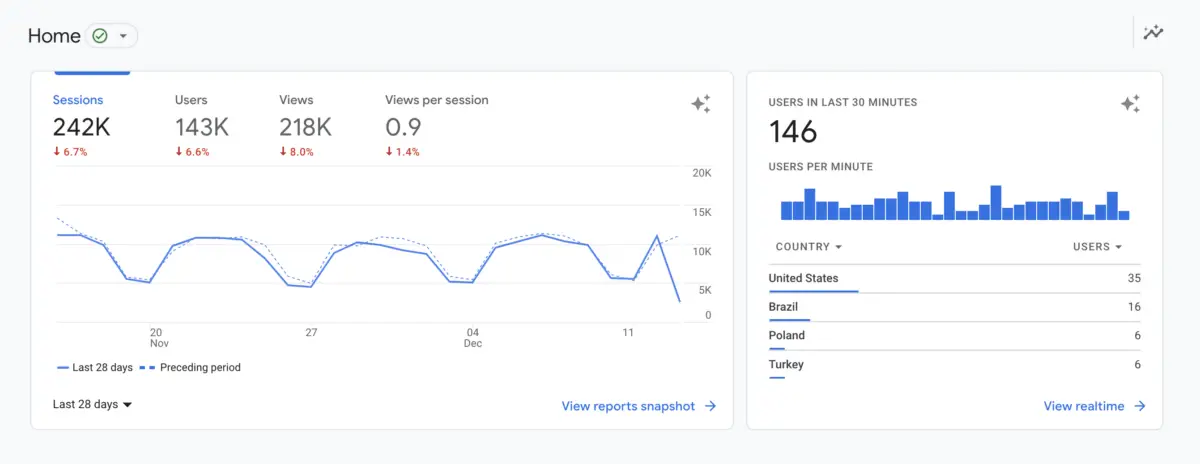
Once you’ve configured your Google Analytics settings, you can begin to view your data. To do this, select Reports from the left-hand menu.
In the Reports section, you’ll be able to see your app’s performance over time. You can see how many users use your app in real time, how long they stay on each page, and which pages are the most popular.
Note: Except for the parameters in the Realtime section, which are constantly updated, other data may have a delay of several hours to a day. To see the full information, please be patient.
You can also view detailed reports such as user acquisition, page views, and time on each page. These insights are very precious to improve things (and spot bugs, if any).
Conclusion
Congratulations! You’ve successfully integrated Google Analytics into your Next.js app. No third-party libraries are required. All we need is to import the Script (I used NextScript as an alias) component from next/script and add the tracking code inside it. If you have any suggestions that can make this article better, please tell us in the comment section. Happy coding and have a nice day!