This article shows you how to correctly use Bootstrap 5 (the latest version at the time of writing) in a Next.js project.
By the end of this article, we will be able to:
- Use all CSS classes provided by Bootstrap 5 wherever you want.
- Use all Javascript functionality provided by Bootstrap 5 without errors.
Without any further ado, let’s get our hands dirty.
The Steps
Installing
You can add Bootstrap 5 to your Next.js project by executing the following command:
npm i bootstrapAdding CSS
To use the styles from Bootstrap, we need to manually import its CSS file into the pages/_app.js file (create one if it doesn’t exist) :
import 'bootstrap/dist/css/bootstrap.css'; // Add this line
import '../styles/globals.css'

function MyApp({ Component, pageProps }) {
  return <Component {...pageProps} />
}

export default MyApp
At this point, you are ready to use Bootstrap’s CSS features like this:
<button className="btn btn-primary m-3">Button Primary</button>However, components that need Javascript like dropdown, collapse, accordion, carousel… will NOT function properly and will cause errors even if you import Bootstrap’s Javascript file like this:
import "bootstrap/dist/js/bootstrap";To fix this, we have to do an extra step.
Using Javascript features
Bootstrap uses some only client-side objects (window, document) to handle events. On the other hand, Next.js renders the app on both the server side and the client side. There is no window or document on the server side; therefore, you can see some error messages as the following:
document is not defined
windows is not defiend
To avoid the mentioned errors, we have to make sure that the window and document objects only be used on the client side. That can be done with the useEffect hook:
// Place this in the pages/_app.js file
useEffect(() => {
    import("bootstrap/dist/js/bootstrap");
}, []);
The complete _app.js file:
import 'bootstrap/dist/css/bootstrap.css'; // Add this line
import '../styles/globals.css';

import { useEffect } from 'react';

function MyApp({ Component, pageProps }) {
  useEffect(() => {
    import('bootstrap/dist/js/bootstrap');
  }, []);

  return <Component {...pageProps} />;
}

export default MyApp;
For more clarity, see the full example below.
The Example
Preview
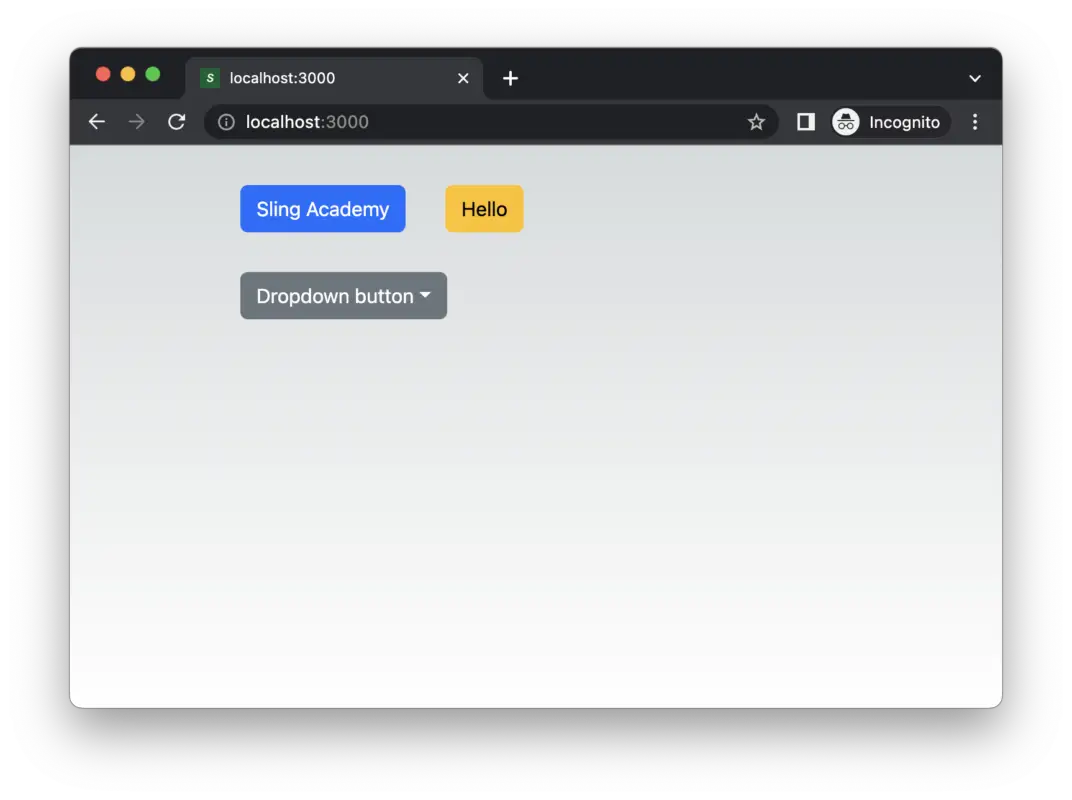
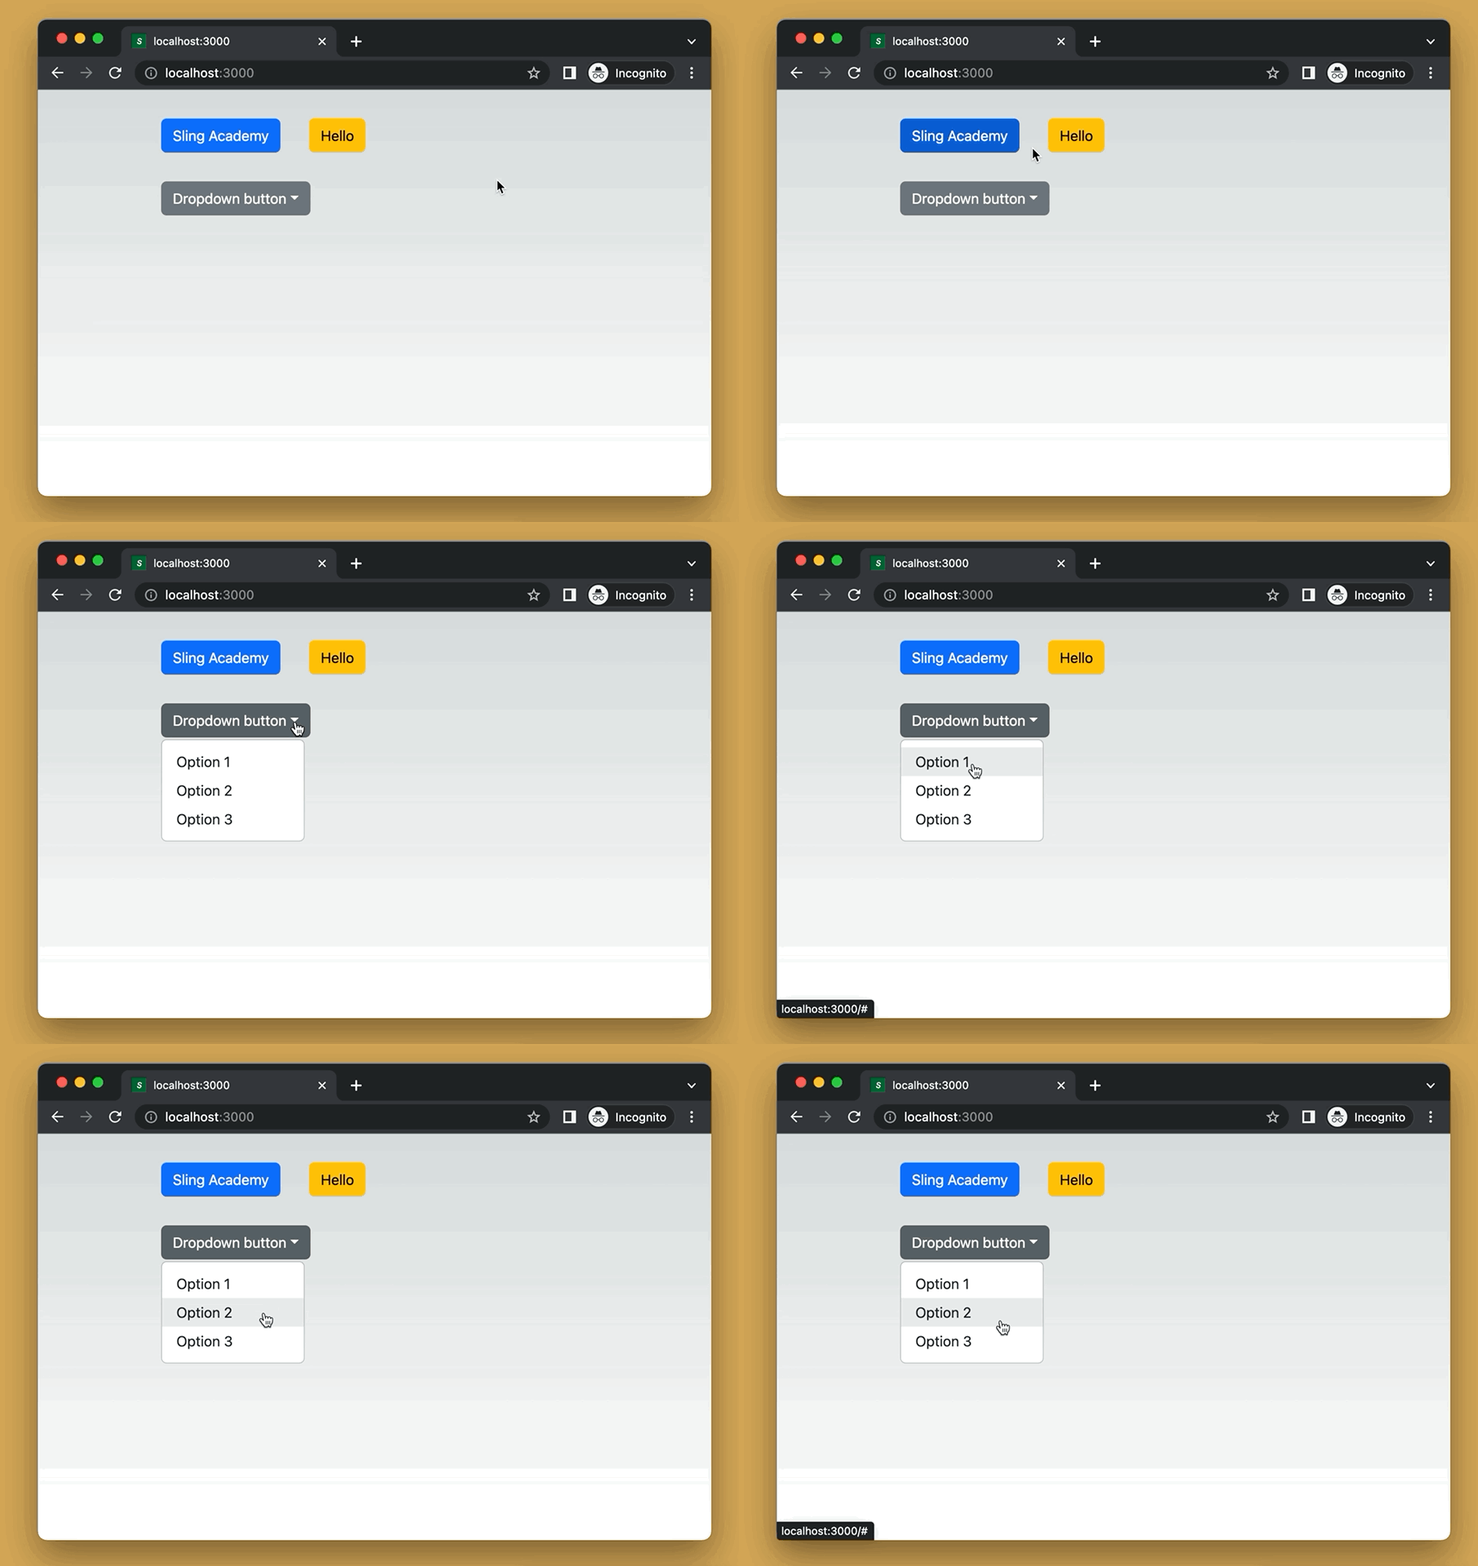
In this demo, we have some beautiful buttons made with Bootstrap. The dropdown select button is a thing that needs Javascript to work.
The Code
1. The code in pages/_app.js:
// pages/_app.js
import "bootstrap/dist/css/bootstrap.css";
import "../styles/globals.css";

import { useEffect } from "react";

function MyApp({ Component, pageProps }) {
  useEffect(() => {
    import("bootstrap/dist/js/bootstrap");
  }, []);

  return <Component {...pageProps} />;
}

export default MyApp;
2. And here is pages/index.js:
// pages/index.js
export default function Home() {
  return (
    <div className="container p-3 vh-100">
      <button className="btn btn-primary m-3">Sling Academy</button>
      <button className="btn btn-warning m-3">Hello</button>

      <div className="dropdown m-3">
        <button
          className="btn btn-secondary dropdown-toggle"
          type="button"
          data-bs-toggle="dropdown"
          id="dropdownMenuButton1"
          aria-expanded="false"
        >
          Dropdown button
        </button>
        <ul className="dropdown-menu" aria-labelledby="dropdownMenuButton1">
          <li>
            <a className="dropdown-item" href="#">
              Option 1
            </a>
          </li>
          <li>
            <a className="dropdown-item" href="#">
              Option 2
            </a>
          </li>
          <li>
            <a className="dropdown-item" href="#">
              Option 3
            </a>
          </li>
        </ul>
      </div>
    </div>
  );
}
3. Start the app:
npm run devFinally, go to http://localhost:3000 to check it out.

