Next.js is a rapidly growing open-source React framework for building web applications. It is fast, efficient, and offers an extensive set of features, including server-side rendering, dynamic routing, and static optimization. In this article, we’ll provide a step-by-step guide to deploying a Next.js application on Ubuntu.
Ubuntu is a popular Linux distribution used for web servers. It is reliable, secure, and easy to use. It is also highly scalable and can be used to deploy applications of all sizes. That’s why it’s a great choice for your production Next.js app.
Showcase: tools.slingacademy.com is a production-level Next.js app deployed by following the steps listed in this article.
Prerequisites
Before you begin deploying your Next.js application on Ubuntu, there are a few prerequisites you need to take care of:
- A fresh Ubuntu server that you can access via SSH. You can easily get an Ubuntu server from Amazon Lightsail, Digital Ocean, Vultr, Linode, etc. Most of these services offer some free tiers so that you can try some of them at no cost.
- A domain that points to the IP address of your server. You can get a domain with a few bucks from a wide range of registrars, such as Google Domain, Namesilo, Godaddy, Yahoo, Cloudflare, etc. Throughout this article, you’ll see slingacademy.com. Just replace it with your own domain.
- Basic knowledge of Git
The Steps
Setting Up Nginx
Nginx is a web server used to serve web pages and applications. You can install Nginx using the apt package manager.
1. Update the apt package index by executing the following command:
sudo apt update2. Start installing Nginx:
sudo apt install nginx3. Start the NGINX service with the command below:
sudo systemctl start nginx4. Check whether Nginx is running correctly:
sudo systemctl status nginxYou should see some output like this:
● nginx.service - A high performance web server and a reverse proxy server
   Loaded: loaded (/lib/systemd/system/nginx.service; enabled; vendor preset: enabled)
   Active: active (running) since Thu 2022-12-13 16:08:19 UTC; 2 hours ago
     Docs: man:nginx(8)
Make sure the service starts automatically at when your server restarts, run this command:
sudo systemctl enable nginxConfigure Nginx to Serve the Next.js App
A server block can be used to encapsulate configuration details and host more than one domain from a single server. The process of setting up a server block for a domain is described in the steps below.
1. Create a new configuration file for your domain:
sudo nano /etc/nginx/sites-available/slingacademy.com2. Add the following to the recently created file:
server {
        client_max_body_size 64M;
        listen 80;
        server_name slingacademy.com www.slingacademyc.om;

        location / {
                proxy_pass             http://127.0.0.1:3000;
                proxy_read_timeout     60;
                proxy_connect_timeout  60;
                proxy_redirect         off;

                # Allow the use of websockets
                proxy_http_version 1.1;
                proxy_set_header Upgrade $http_upgrade;
                proxy_set_header Connection 'upgrade';
                proxy_set_header Host $host;
                proxy_cache_bypass $http_upgrade;
        }

}
Don’t forget to replace slingacademy.com by your own domain. This is very important!
3. Enable the file by creating a link from it to the sites-enabled directory, which Nginx reads from during startup:
sudo ln -s /etc/nginx/sites-available/slingacademy.com /etc/nginx/sites-enabled/4. To make sure the configuration file has correct syntax, run the command below:
sudo nginx -tYou should see this:
nginx: the configuration file /etc/nginx/nginx.conf syntax is ok
nginx: configuration file /etc/nginx/nginx.conf test is successful
5. Restart your Nginx server:
sudo systemctl restart nginxWe aren’t done yet. Let’s move to the next section.
Installing Node.js, NPM, and PM2
To build and run a Next.js app, Node.js is mandatory. You can get it installed by following a few steps listed below:
1. Navigate to the home directory:
cd ~2. Download the setup material:
curl -fsSL https://deb.nodesource.com/setup_18.x | sudo -E bash -3. Install Node and NPM:
sudo apt-get install -y nodejs4. Verify that Node.js and NPM were set up correctly by running the 2 commands below:
node -vAnd:
npm -vThe output will be their version information.
5. Now it’s time to install PM2 globally on your server:
npm install -g pm2Build and Deploy Next.js
Normally, you would save your Next.js project on Github (you can also manually upload the Next.js project from your computer).
1. Choose a directory where you want to put your application (it doesn’t matter where) and clone the project from git:
git clone https://github.com/<your Github username>/<your project name>.git next-app2. Navigate into the next-app directory:
cd next-appInstall dependencies:
npm install3. Build and optimize the Next.js app:
npm run build4. Run your Next.js app in production with pm2 (which was installed in a step above):
pm2 start npm --name "my-next-app" -- startmy-next-app is the name of the app. You can change it if you want.
Check that things work fine by using this command:
pm2 statusTo stop your app, run this:
pm2 stop my-next-appTo restart it, run the following:
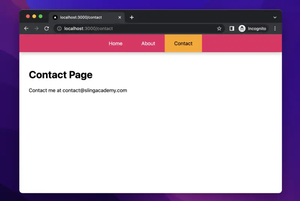
pm2 restart my-next-appTo ensure that your app is up and running, go to http://<your domain>. In the next step, we’ll configure https for your domain.
Setting Up Let’s Encrypt SSL (HTTPS)
Once you’ve configured Nginx for Next.js, you need to set up the SSL certificate. SSL certificates are used to encrypt traffic between your server and client. You can get an SSL certificate for free by using Let’s Encrypt.
1. Install cerbot and its plugins:
sudo apt install certbot python3-certbot-nginx2. Obtain an SSL certificate by performing the command below:
sudo certbot --nginx -d slingacademy.com -d www.slingacademy.comSimilar to the other sections in this article, replace slingacademy.com by your own domain. Never forget it!
After a few seconds, you will see this:
IMPORTANT NOTES:
Successfully received certificate.
Certificate is saved at: /etc/letsencrypt/live/slingacademy.com/fullchain.pem
Key is saved at: /etc/letsencrypt/live/slingacademy.com/privkey.pem
This means you’ve succeeded. The final task is to restart your Nginx server:
sudo sytemctl restart nginxNow you can see your Next.js app online with https instead of http:
https://<your domain>How to Update/Upgrade Your Next.js App
In the future, it is very likely that you will need to edit and upgrade your Next.js application. This is very simple. Once you’re done writing the code, push it to Github. Then, login to your server via SSH, navigate to your project folder, and run:
git pullThen:
npm installAnd this one:
npm run buildFinally:
pm2 restart my-next-appTesting Your Next.js App
Once you’ve deployed the application, you need to test it. This involves testing the functionality and performance of the application. You should also test the security of the application.
You can test your Next.js app manually with a web browser or use a tool like Selenium or JMeter to test it programmatically.
Conclusion
Deploying a Next.js application on Ubuntu is a straightforward process, but it can be time-consuming if this is your first time doing it. Just follow the steps in the article carefully, and you will be fine. When you’re done, it would be nice if you shared the link to your project in the comment section.