TypeScript can help you write more reliable and maintainable code for your Node.js projects. TypeScript code needs to be compiled into JavaScript before it can be executed by Node.js. You can use a tool called tsc (TypeScript compiler) to do that. You also need to install some type definitions for Node.js, which provide information about the types and interfaces of the Node.js module.
Setting up TypeScript in a Node.js project
The steps:
1. Create a new directory for your project and initialize it as a Node.js project with npm init -y. A new file named package.json will be created automatically to store your dependencies.
2. Install TypeScript as a development dependency with npm install --save-dev typescript. This will add TypeScript to your node_modules folder and update your package.json file.
3. Create a tsconfig.json file in the root of your project directory by running the following command:
npx tsc --initThis will generate a configuration file for the TypeScript compiler with some default options. You can modify this file according to your needs, but for this example, you can use the settings below:
{
  "compilerOptions": {
    "target": "es6", // specify the output language level
    "module": "commonjs", // specify the module system for Node.js
    "outDir": "./dist", // specify the output directory for compiled files
    "rootDir": "./src", // specify the input directory for source files
    "strict": true // enable strict mode for type checking
  }
}
4. Install the type definitions for Node.js with npm install --save-dev @types/node. This will add the type definitions to your development dependencies.
5. Create a src folder in your project directory and a index.ts file inside it. Here will be your main source file, where you can write your TypeScript code.
// src/index.ts
interface IUser {
    name: string;
    age: number;
}

const user: IUser = {
    name: 'John Doe',
    age: 33
};

console.log(user);
6. Compile your TypeScript code to JavaScript by running this command:
npx tscThis will programmatically create a dist folder in your project directory and a index.js file inside it. You can see JavaScript code that can be executed by Node.js here.
7. Execute your JavaScript code:
node dist/index.jsOutput:
{ name: 'John Doe', age: 33 }Using Nodemon with TypeScript
Nodemon is a tool that automatically restarts your Node.js application when you make changes to your source files. To use nodemon with TypeScript, you need to configure it to compile and run your TypeScript files with ts-node, which is a TypeScript execution engine. Here are the main steps to do that:
1. Install nodemon and ts-node as development dependencies. You can use the following command to install them with npm:
npm install --save-dev nodemon ts-node2. Create a nodemon configuration file. You can create a file named nodemon.json in the root of your project directory and add the following settings:
{
  "watch": ["src"],
  "ext": "ts",
  "exec": "ts-node ./src/index.ts"
}
3. Run nodemon with the configuration file. You can use the following command to run nodemon with the nodemon.json file:
npx nodemonScreenshot:
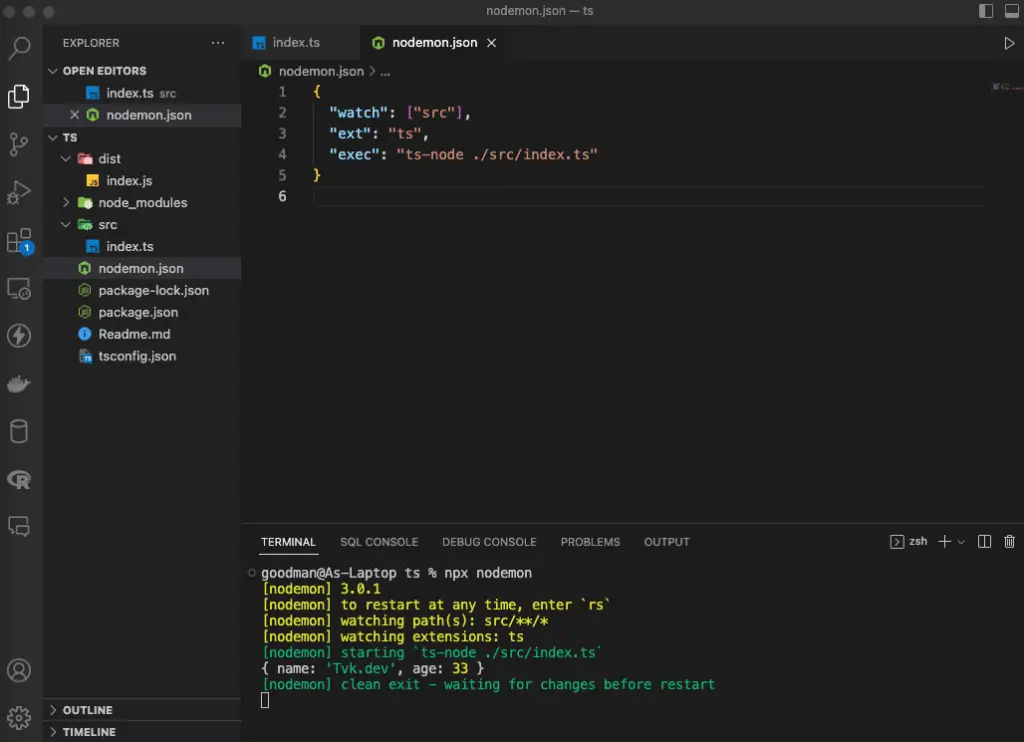
This will start nodemon in watch mode and run your TypeScript file with ts-node whenever you make any changes to your source files. You will save quite a bit of time as well as improve your coding experience.
