This article will show you how to upgrade an existing Next.js project to the latest version. This will ensure that your application is secure, performs well, and is up-to-date with the latest features and functionality of the framework.
Step 1: Update Node.js
For Next.js to work properly, you first need to update Node.js to the current LTS (long-term support) version. At the time of writing, the newest version of Next.js is 13.x, and it requires Node.js 16 at least. In my opinion, you should use Node.js 18.15.0 or later. To update Node.js, just go to the official website nodejs.org, download the LTS version, then install it as a usual software.
Step 2: Update core packages
Update your next, react, react-dom, and eslint-config-next packages to the latest versions using your preferred package manager.
Npm:
npm i next@latest react@latest react-dom@latest eslint-config-next@latestYarn:
yarn add next@latest react@latest react-dom@latest eslint-config-next@latestYou will have to wait a while for the above packages to be loaded and updated. Once the command is done, you will see the versions of the packages in the package.json file change.
Step 3: Restart the ESLint server
In case you’re using ESLint, you may need to restart the ESLint server in VS Code (Visual Studio Code) for the changes to take effect. In order to do so, just open the Command Palette (by pressing Cmd + Shift + P on Mac or Crl + Shift + P on Windows) and search for “ESLint: Restart ESLint Server”.
Step 4: Migrate to the new Image component
With codemods, you can update all of your code files programmatically without having to manually go through each one.
In this step, you will run the next-image-to-legacy-image codemod to safely rename your next/image imports to next/legacy/image. This will ensure that your existing image components will maintain the same behavior as before. Just execute the command below:
npx @next/codemod@latest next-image-to-legacy-image .The dot (.) at the end of the command indicates that you will apply the codemod to all files in your current working directory and its subdirectories.
You will see some output like this:
Results:
0 errors
2 unmodified
0 skipped
5 ok
Time elapsed: 0.393seconds
Depending on the number of files and the complexity of your project, your output may look bigger than mine.
Step 5: Upgrade Link components
In this step, you need to run the new-link codemod to upgrade your next/link components. This will remove the nested <a> tags from your link components and forward props to the underlying <a> tag rendered by Next.js.
Execute this command:
npx @next/codemod@latest new-link .Step 6: Test your project
Test your project and make sure everything works as expected. Boot your Next.js app up by performing the following command:
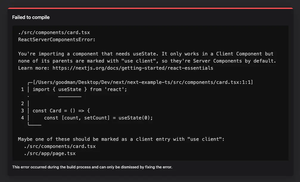
npm run devIf you see warnings or error messages, stay calm and fix them one by one. In most cases, everything will be fine. However, if you do use third-party libraries, you may see warnings or error messages, so stay calm and fix them one by one. Since there are so many third-party libraries out there and everyone uses a different set of libraries, I cannot cover them all in this article.
Happy coding & have a nice day!


