Introduction
MUI (Material UI) is a popular library of React components that follow the Material Design guidelines. Next.js 14 is the latest version of the framework for building React applications with features such as server-side rendering, static site generation, and app routing. In this response, I will explain how to integrate and use MUI in Next.js 14.
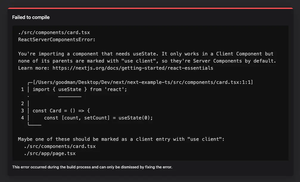
To use MUI in Next.js 14, we need to install some dependencies, configure some files, and import the MUI components that we want to use in our pages. We also need to use the use client annotation to indicate that our pages are client components, which means they run in the browser and can use MUI features such as theming and styling.
Steps to Intergate MUI into Next.js 14
Here are the steps to integrate and use MUI in Next.js:
1. Create a Next.js application using the create-next-app command with the --experimental-app and --typescript flags. For example:
npx create-next-app@latest --experimental-app nextjs13-with-mui --typescript2. Install the packages required for MUI. The @emotion/react and @emotion/styled are peer dependencies of MUI. For example:
npm install @mui/material @emotion/react @emotion/styled3. Delete the pages folder, as we will use the app folder (App Router) to define our pages.
4. Inside the app/layout.tsx file, import the AppRouterCacheProvider component from @mui/material-nextjs/v13-appRouter and wrap all elements under the <body> with it. This component provides the necessary cache for MUI to work with the Next.js app router. For example:
// app/layout.tsx
import { AppRouterCacheProvider } from "@mui/material-nextjs/v13-appRouter";

export default function RootLayout(props) {
  const { children } = props;
  return (
    <html lang="en">
      <body>
        <AppRouterCacheProvider>{children}</AppRouterCacheProvider>
      </body>
    </html>
  );
}
5. Inside the app/page.tsx file, import the MUI components that you want to use and render them inside the return statement. You also need to add the use client annotation at the top of the file to indicate that this is a client component. For example:
// app/page.tsx
"use client";
import { Button, Grid, Stack } from "@mui/material";

export default function Home() {
  return (
    <Grid
      container
      height="100vh"
      alignItems="center"
      justifyContent="center"
      direction="column"
    >
      <h1>Using MUI with Next.js 13</h1>
      <Stack direction="row" columnGap={1}>
        <Button variant="text">Text</Button>
        <Button variant="contained">Contained</Button>
        <Button variant="outlined">Outlined</Button>
      </Stack>
    </Grid>
  );
}
Complete code example
Here is the complete code example that you can run to see the result:
// app/layout.tsx
import { AppRouterCacheProvider } from "@mui/material-nextjs/v13-appRouter";

export default function RootLayout(props) {
  const { children } = props;
  return (
    <html lang="en">
      <body>
        <AppRouterCacheProvider>{children}</AppRouterCacheProvider>
      </body>
    </html>
  );
}

// app/page.tsx
"use client";
import { Button, Grid, Stack } from "@mui/material";

export default function Home() {
  return (
    <Grid
      container
      height="100vh"
      alignItems="center"
      justifyContent="center"
      direction="column"
    >
      <h1>Using MUI with Next.js 13</h1>
      <Stack direction="row" columnGap={1}>
        <Button variant="text">Text</Button>
        <Button variant="contained">Contained</Button>
        <Button variant="outlined">Outlined</Button>
      </Stack>
    </Grid>
  );
}
Conclusion
In this tutorial, I have explained how to integrate and use MUI in Next.js 14 using a simple example. By using these things together, I hope you can build great web apps to make the world a better place to live. Happy coding & see you again in other articles.
