This article walks you through two complete examples of using styled JSX in Next.js. The first example helps you learn the syntax of styled JSX and shows you how to use local and global styles. The second one demonstrates how to add dynamic styles with styled JSX.
Global and local styles with styled JSX
Styled JSX is a built-in feature of Next.js. That means you can use it without installing any third-party libraries or performing an extra setup.
With styled JSX, you can use standard CSS syntax in your JS files. Just put your CSS code inside a pair of back-ticks (“) and <style jsx> tag like so:
<div className="wrapper">
      <h1>Hello</h1>

      <style jsx>
        {`
          .wrapper {
            background: #3f51b5;
            padding: 60px 30px;
          }
          h1 {
            color: #ff9800;
          }
        `}
      </style>
 </div>
These styles DO NOT affect elements with the wrapper class name or <h1> tags in other components. Styled JSX, by default, is scoped to a single component only (local styles) by applying additional unique class names to styled elements.
To add global styles, you can use <style jsx global> like this:
<style jsx global>
        {`
          p {
            color: #fff;
          }
        `}
</style>
To keep the code organized, it’s good to put global styles in pages/_app.js.
Example Preview
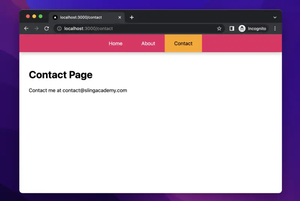
The sample app we’re going to build consists of 2 pages: Home (pages/index.js) and About (pages/about.js). We will use global styles for a <div> tag whose class name is layout and <p> tags as well as <a> tags. Meanwhile, we use local styles for <div> tags whose class name is wrapper and <h1> tags.
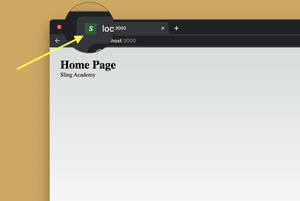
Here’s what it looks like:

Writing Code
1. Create a brand new Next.js project by executing this command:
npx create-next-app example2. As mentioned before, it’s nice to place globally styled JSX in pages/_app.js. Remove all of the default code and add the following:
// pages/_app.js

function MyApp({ Component, pageProps }) {
  return (
    <div className="layout">
      <Component {...pageProps} />

      <style jsx global>
        {`
          .layout {
            padding: 50px;
          }
          p {
            color: #fff;
          }
          a {
            color: #ffeb3b;
            text-decoration: underline;
          }
          a:hover {
            color: #ffc107;
          }
        `}
      </style>
    </div>
  );
}
export default MyApp;
3. Here’s the code for pages/index.js:
// pages/index.js
import Link from 'next/link';

export default function Home() {
  return (
    <div className='wrapper'>
      <h1>Home Page</h1>
      <p>Welcome to Sling Academy</p>
      <Link href='/about'>Go to About page</Link>

      <style jsx>
        {`
          .wrapper {
            padding: 60px 30px;
            background: #3f51b5;
          }
          h1 {
            color: #ff9800;
          }
        `}
      </style>
    </div>
  );
}
4. In your /pages directory, create a new file named about.js and add the following code to it:
// pages/about.js
import Link from 'next/link';
export default function About() {
  return (
    <div className='wrapper'>
      <h1>About Page</h1>
      <Link href='/'>Go Home</Link>
      <style jsx>
        {`
          .wrapper {
            background: #4caf50;
            padding: 50px 30px;
          }
          h1 {
            color: #fff;
          }
        `}
      </style>
    </div>
  );
}
Adding dynamic styles with styled JSX
By using styled JSX, we can take benefit of dynamic styles. A component can have different appearances based on its props or other conditions (URL, state, etc.).
App Preview
In this example, we’ll display the name of an animal on the following page:
pages/animals/[name].jsIf the name contains more than 4 characters, it will be red. Otherwise, its color will be blue. Here’s the demo:
The Code
1. Create a new Next.js project:
npx create-next-app example-twoThe name of the project is totally up to you.
2. Remove all of the default code in your pages/_app.js then add the code below:
// pages/_app.js
function MyApp({ Component, pageProps }) {
  return (
    <div className="layout">
      <Component {...pageProps} />

      <style jsx global>
        {`
          a {
            color: blue;
            text-decoration: underline;
          }
          a:hover {
            color: red;
          }
        `}
      </style>
    </div>
  );
}
export default MyApp;
3. Replace the default code in pages/index.js with the following:
// pages/index.js
import Link from 'next/link';

export default function Home() {
  return (
    <div className='home'>
      <p>
        <Link href='/animals/dog'>Dog</Link>
      </p>
      <p>
        <Link href='/animals/dragon'>Dragon</Link>
      </p>
      <p>
        <Link href='/animals/duck'>Duck</Link>
      </p>
      <p>
        <Link href='/animals/pig'>Pig</Link>
      </p>
      <style jsx>
        {`
          .home {
            padding: 30px;
          }
        `}
      </style>
    </div>
  );
}
3. Inside your /pages directory, create a new folder called animals. Inside animals, create a new file named [name].js and add the code below to it:
// pages/animals/[name].js
import { useRouter } from 'next/router'
export default function Animal(){
  const router = useRouter();
  const { name } = router.query;

  return <div className='animal'>
    <h1>{name}</h1>

    <style jsx>
    {`
      .animal {
        padding: 30px 50px;
      }
      h1 {
        color: ${name && name.length >= 4 ? 'red' : 'blue'}
      }
    `}
    </style>
  </div>
}
4. Now run the project and check the result.
Conclusion
We’ve examined two end-to-end examples of using styled JSX in Next.js. With this knowledge in mind, you’ll have more options to choose from when styling your apps (a small drawback is that code readability can be more difficult when mixing CSS and JS).