Introduction
Internationalizing your web application allows it to reach a wider, global audience. This tutorial will guide you through the process of setting up internationalization (i18n) in your Next.js v13 or newer applications.
Prerequisites:
- Basic knowledge of React and Next.js.
- Next.js v13 or newer installed in your development environment.
- A code editor, like VS Code.
Initial Setup
To start with i18n in Next.js, you must first have a Next.js project. If you don’t have one, create it using:
npx create-next-app@latest your-app-name
Configure i18n in Next.js
Add i18n configuration to your next.config.js:
module.exports = {
    i18n: {
        // These are the languages your project supports:
        locales: ['en', 'fr', 'es'],
        // This is the default locale you want to be used when visiting a non-locale prefixed path:
        defaultLocale: 'en'
    },
};
Locale Detection
Next.js automatically detects the locale to serve based on the user’s location and browser settings. You can control locale detection with the following settings:
module.exports = {
    i18n: {
        locales: ['en', 'fr', 'es'],
        defaultLocale: 'en',
        localeDetection: false, // Disable if you want to handle it manually
    },
};
Implementing Localization
With Next.js, you can use any number of libraries such as i18next, react-intl, or next-translate. In this tutorial, we’ll focus on next-i18next for its simplicity and deep integration with Next.js features.
Installing next-i18next
npm install next-i18next
Setting Up next-i18next
Create a new file named next-i18next.config.js alongside your next.config.js file:
module.exports = {
    i18n: {
        defaultLocale: 'en',
        locales: ['en', 'fr', 'es'],
    },
};
Then, initialize next-i18next by creating a file named server.js:
const { nextI18NextRewrites } = require('next-i18next/rewrites');

const localeSubpaths = nextI18NextRewrites({
  locales: ['en', 'fr', 'es'],
  defaultLocale: 'en',
});

module.exports = {
    rewrites: async () => localeSubpaths,
    publicRuntimeConfig: {
        localeSubpaths,
    },
};
Using Namespaces
Namespaces allow you to compartmentalize translations into multiple files:
// Example for 'common' namespace
// public/locales/en/common.json
{
    "hello": "Hello World"
}
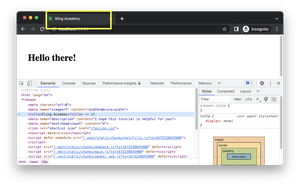
Accessing Translations in Your Application
Within your Next.js pages, you can now access translations dispatcher:
import { useTranslation } from 'next-i18next';

export default function HomePage() {
  const { t } = useTranslation('common');
  return {t('hello')};
}
Just Go Forth
You can extend the capabilities of i18n in your application by exploring features like dynamic route translations, language subpath routing, and more. It’s also a good practice to abstract out the translation hooks for cleaner code and better reusability.
Conclusion
Setting up i18n in Next.js can seem complex at first, but following the right steps, you can easily configure your application to serve diverse audiences. Remember to keep translations up-to-date, test different locales thoroughly, and refine your localization strategy as your application evolves.