When developing apps for Apple devices using SwiftUI, there might be situations where you find it necessary to use a third-party package. This can help you save tons of time and effort.
There are a variety of third-party packages that can be used in SwiftUI projects, and the best ones for your particular use case will depend on what you’re trying to accomplish. Some of the most popular ones are Alamofire (which helps you make HTTP requests easier), Firebase (cloud databases, auth, etc.), Kingfisher (image stuff), and SwiftyJSON (JSON stuff).
The following steps show you how to install a third-party package in your SwiftUI project.
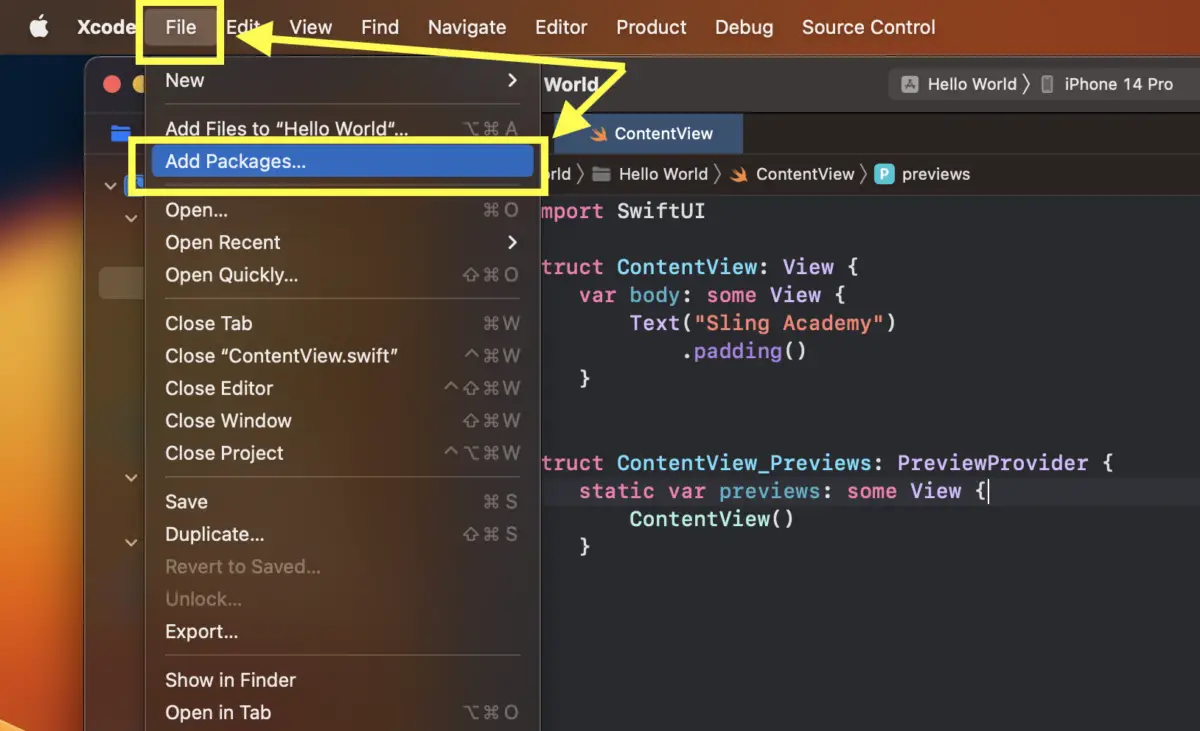
1. Open your project, select “File” from the top bar, then click on “Add Package…” from the dropdown menu, as shown in the screenshot below:
2. A big dialog will appear. On the left-hand side is a list of Apple Swift packages (you can install some of them as needed). In order to install a third-party package, enter the package’s name or its git URL (the URL that ends with .git) into the text field that locates in the top right corner:

For example, you can get the git URL of the Kingfisher package on GitHub (fortunately, most famous libraries can be found on this site) like this:
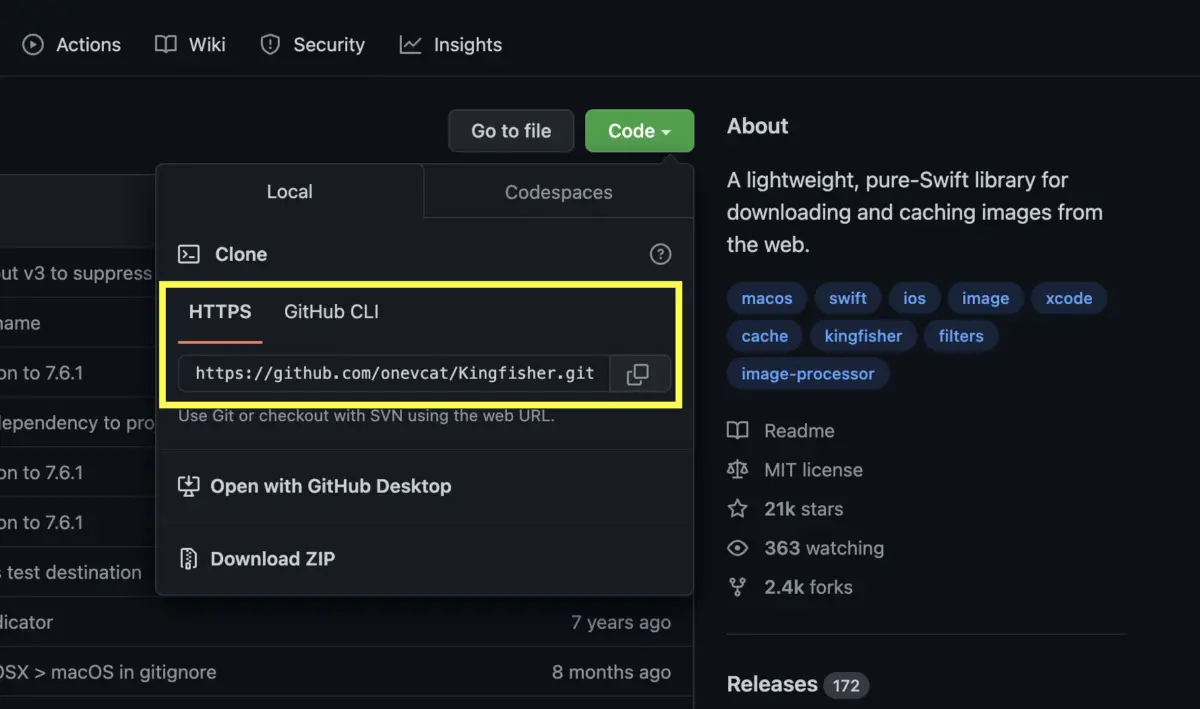
Copy and paste the git URL into the box:
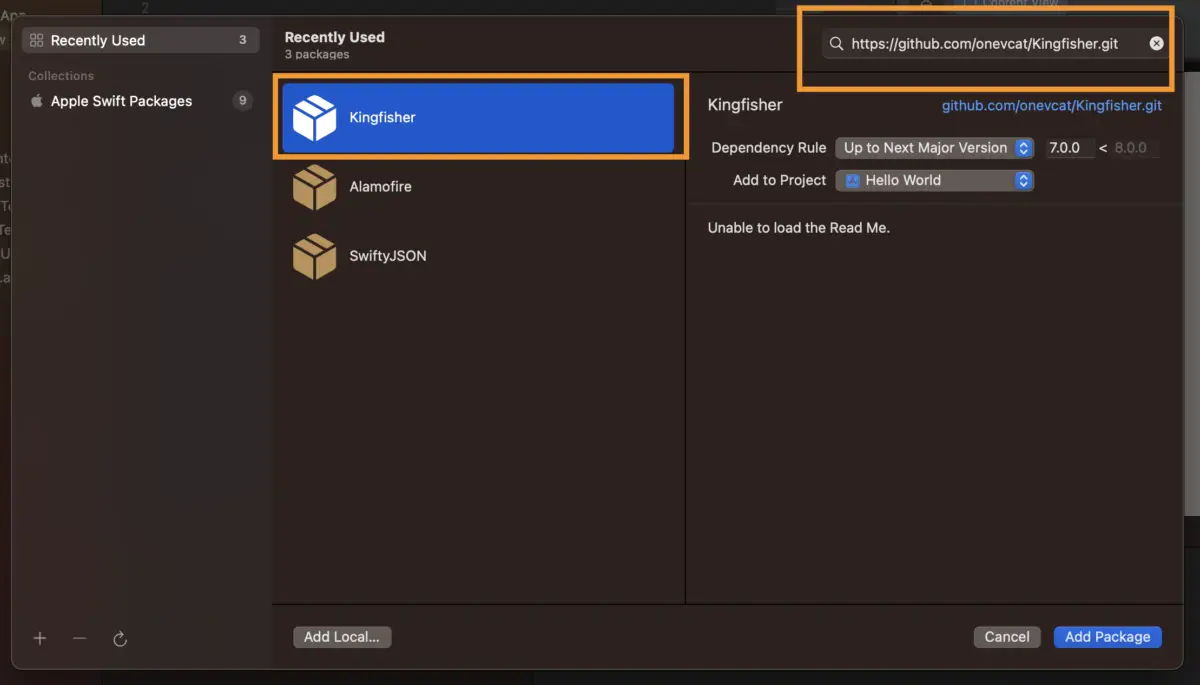
Then click on the Add Package button to continue.
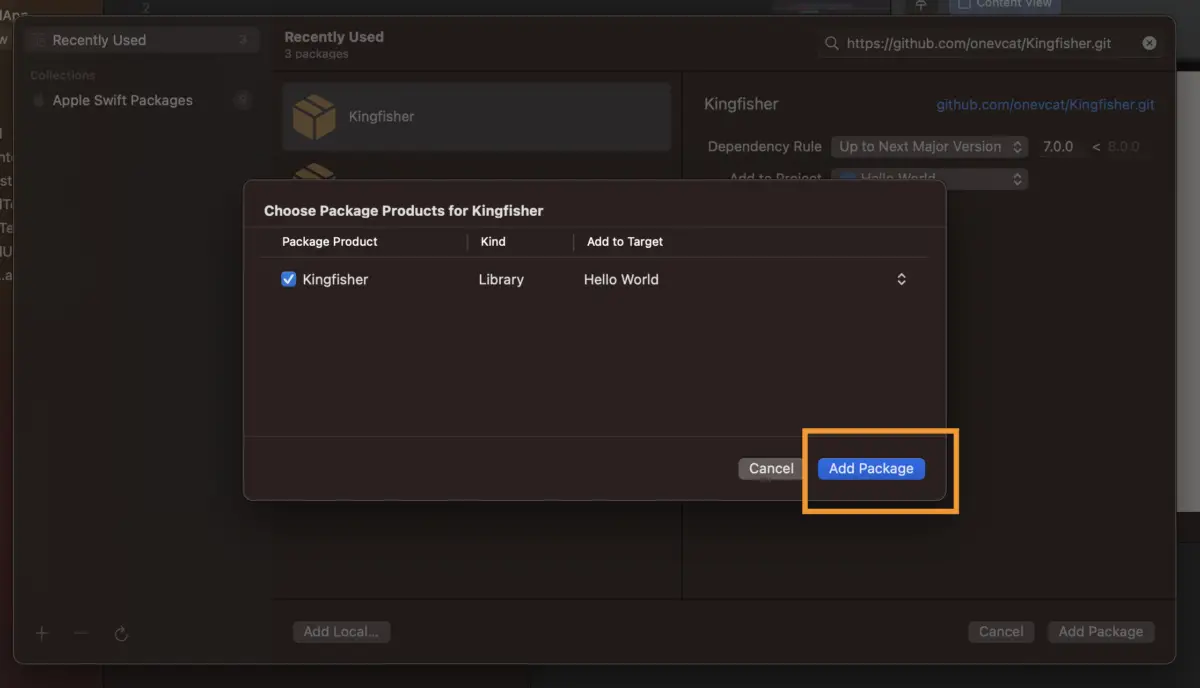
3. It will take a few seconds to load the package. One the process is done, click on the Add Package (there are 2 Add Package buttons) button to finish:
4. Now you can import the package into your code as follows:
import SwiftUI
import Kingfisher

struct ContentView: View {
    var body: some View {
        Text("Sling Academy")
            .padding()
    }
}

struct ContentView_Previews: PreviewProvider {
    static var previews: some View {
        ContentView()
    }
}
That’s it. If you have any questions, please leave a comment. Happy coding!