This article is about using CSS modules in Next.js.
Table of Contents
Overview
Next.js supports CSS modules out of the box. That means you can use it without extra setups or installing any third-party libraries.
CSS modules are locally scoped, so you can totally avoid naming collisions when creating CSS classes with the same names in different files. Behind the scene, CSS modules generate unique class names by adding postfixes (e.g., container__3dj4e, container__9d8j2).
In Next.js, CSS module files must be named as below:
[name].module.cssThe .module.css extension is mandatory. You can import a CSS module file everywhere in your project. Its content will be transformed into a Javascript object, where every key is a class name.
Let’s say we have a CSS module file named Home.module.css in the styles folder:
/* styles/Home.module.css */
.container {
  width: 300px;
  height: 300px;
  background: orange;
}
Then we can import and use it like so:
// pages/index.js
import styles from "../styles/Home.module.css";

export default function Home() {
  return <div className={styles.container}></div>;
}
A Complete Example
App Preview
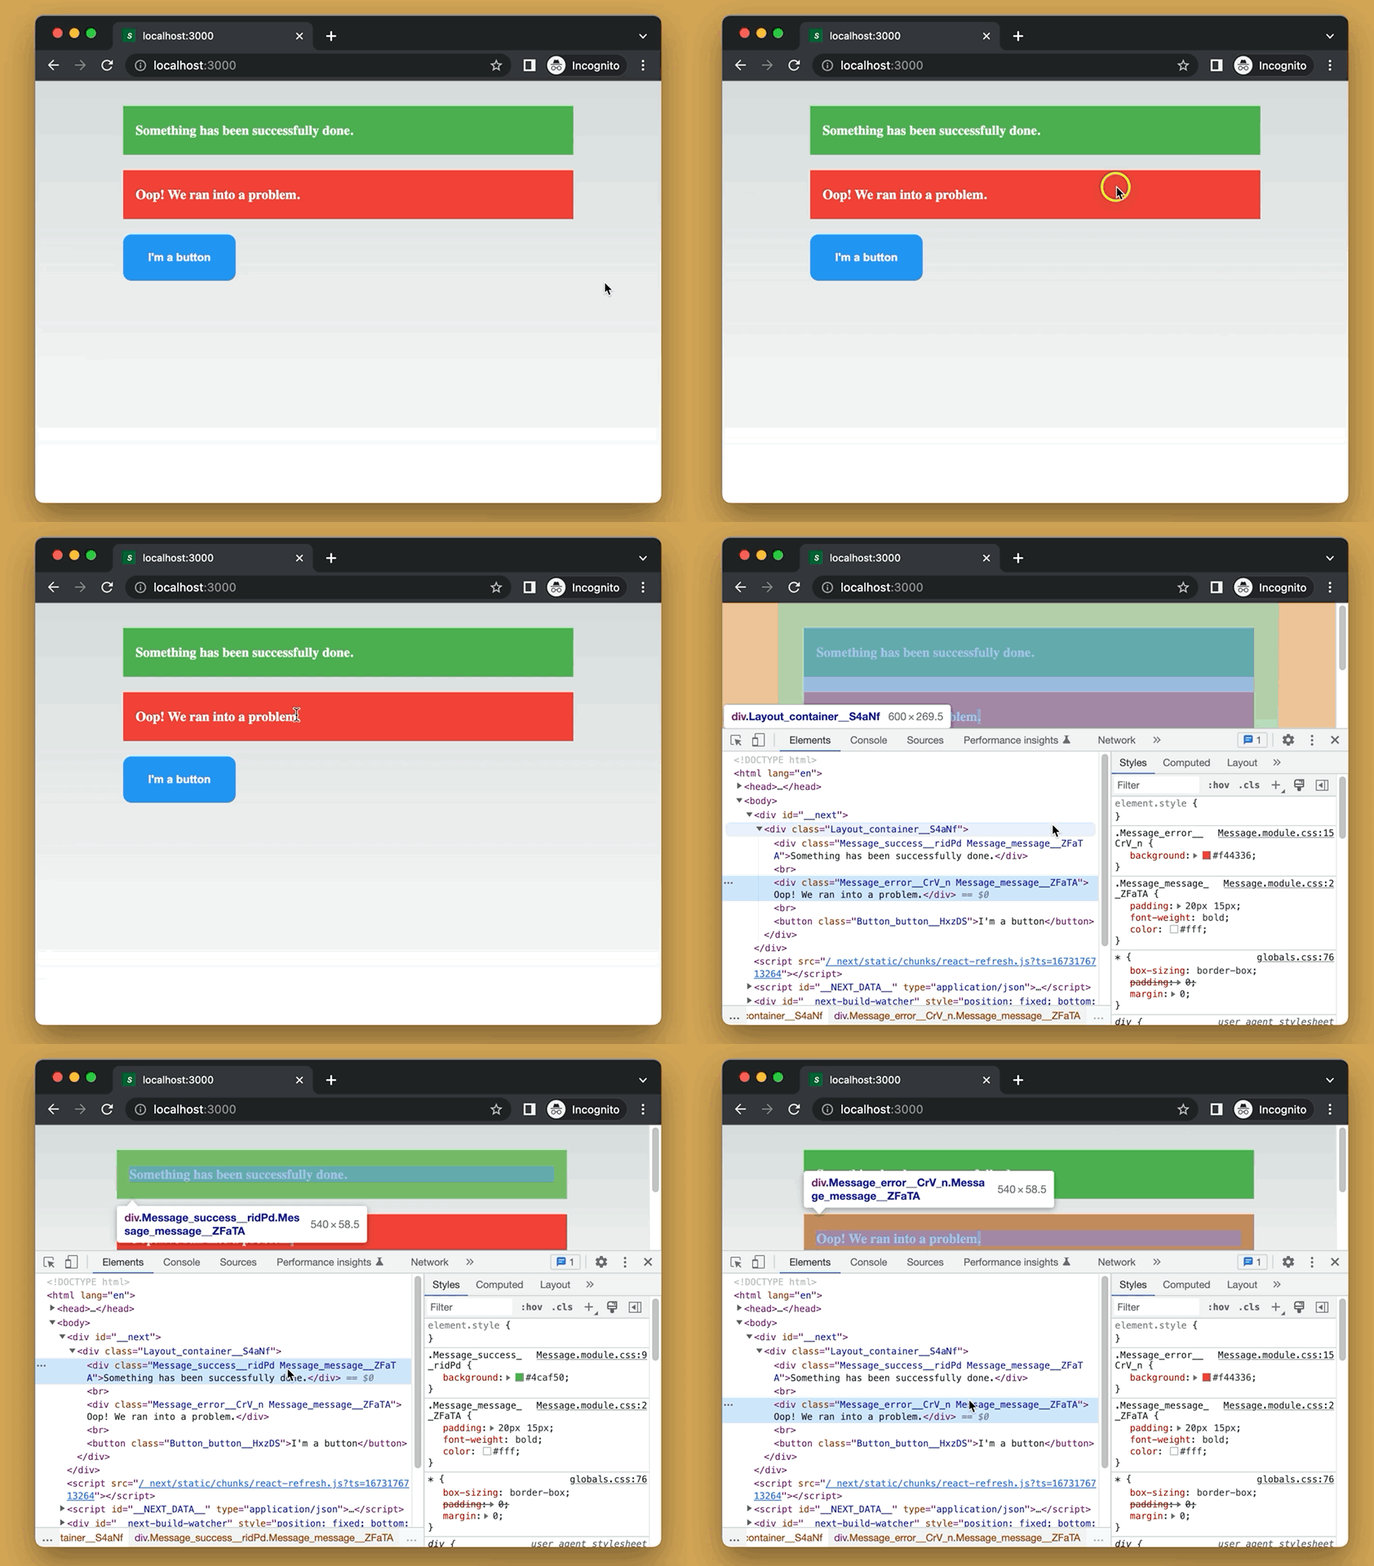
The sample app we will build displays a grey box with a success message, an error message, and a blue button inside. These elements are styled with CSS modules. When inspecting them (press F12 or right-click, then select Inspect from the context menu), we can see the actual class names.
The Code
1. Create a brand new Next.js project by performing the following command:
npx create-next-app example2. Create a new file called Layout.module.css in the styles folder and add the following to it:
/* styles/Layout.module.css */
.container {
  max-width: 600px;
  min-height: 300px;
  margin: 50px auto;
  padding: 30px;
  background: #eeeeee;
}
3. Create a new file named Message.module.css in the styles folder and add the code below to it:
/* styles/Message.module.css */
.message {
  padding: 20px 15px;
  font-weight: bold;
  color: #fff;
}

/* We use 'composes' to reduce code repetition */
.success {
  composes: message;
  background: #4caf50;
}

/* We use 'composes' to reduce code repetition */
.error {
  composes: message;
  background: #f44336;
}
4. Create a new file named Button.module.css in the styles folder and add the following:
/* styles/Button.module.css */
.button {
  padding: 20px 30px;
  background: #2196f3;
  color: #fff;
  font-weight: bold;
  border-radius: 10px;
  outline: none;
  border: none;
  cursor: pointer;
}

.button:hover {
  background: #e91e63;
}
5. Remove all of the default code in your pages/index.js and add the code below:
// pages/index.js
import layoutStyles from "../styles/Layout.module.css";
import buttonStyles from "../styles/Button.module.css";
import messageStyles from "../styles/Message.module.css";

export default function Home() {
  return (
    <div className={layoutStyles.container}>
      <div className={messageStyles.success}>
        Something has been successfully done.
      </div>
      <br />

      <div className={messageStyles.error}>Oop! We ran into a problem.</div>

      <br />
      <button
        className={buttonStyles.button}
        onClick={() => {
          console.log("Hello");
        }}
      >
        I'm a button
      </button>
    </div>
  );
}
Run the project and go to http://localhost:3000 to check your work.


