This concise, straightforward article shows you how to upload and validate files in a FastAPI application.
Uploading Files
The Steps
To receive and handle files as well as form data from incoming requests in FastAPI, we need to process through the following steps:
1. INstall the python-multipart module:
pip install python-multipart2. Import File and UploadFile:
from fastapi import File, UploadFile3. Define a file parameter with a type of UploadFile when declaring the path operation function (controller function):
async def create_upload_file(file: UploadFile)4. Use the file object to access its attributes and methods, such as filename, content_type, file.read(), file.write(), etc.
Minimal Example
Let’s see a practical example for more clarity:
# main.py
from fastapi import FastAPI, File, UploadFile

app = FastAPI()

@app.post("/uploadfile/")
async def create_upload_file(file: UploadFile):
    # do something with the file
    return {"filename": file.filename}
Get it up and running:
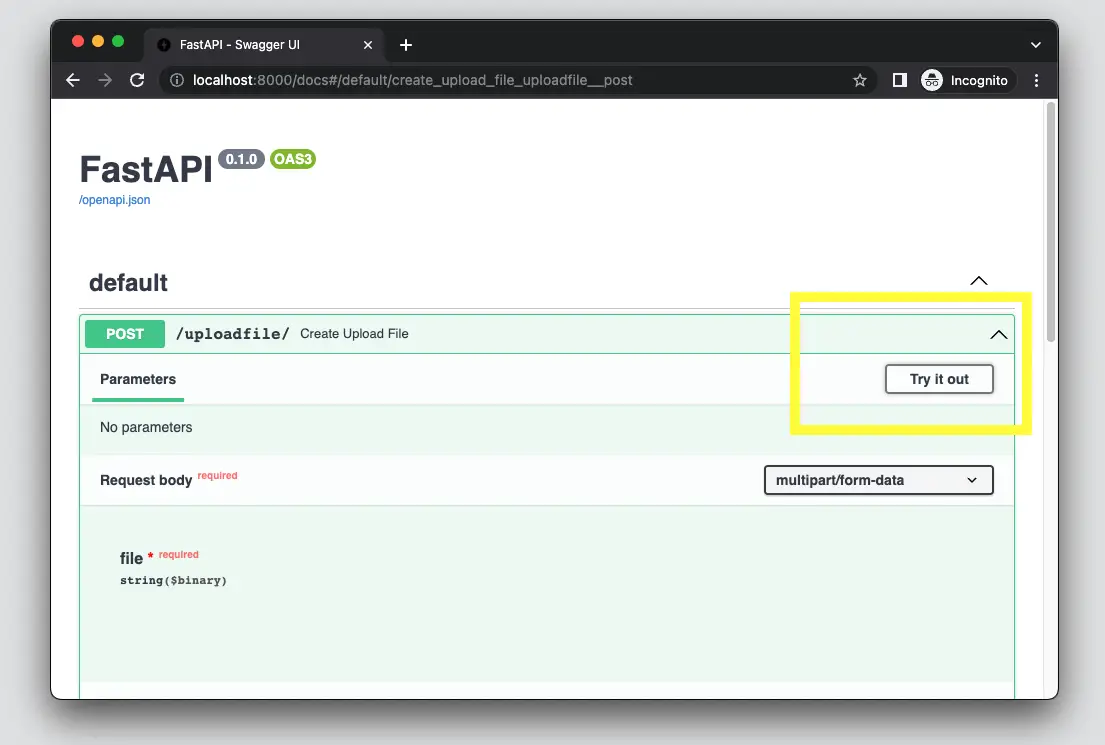
uvicorn main:app --reloadTo make sure everything works as expected, we can use the built-in interactive docs of FastAPI (the Swagger UI). Go to:
http://localhost:8000/docsExpand the /uploadfile/ route, and you will see a Try it out button. Click that button.
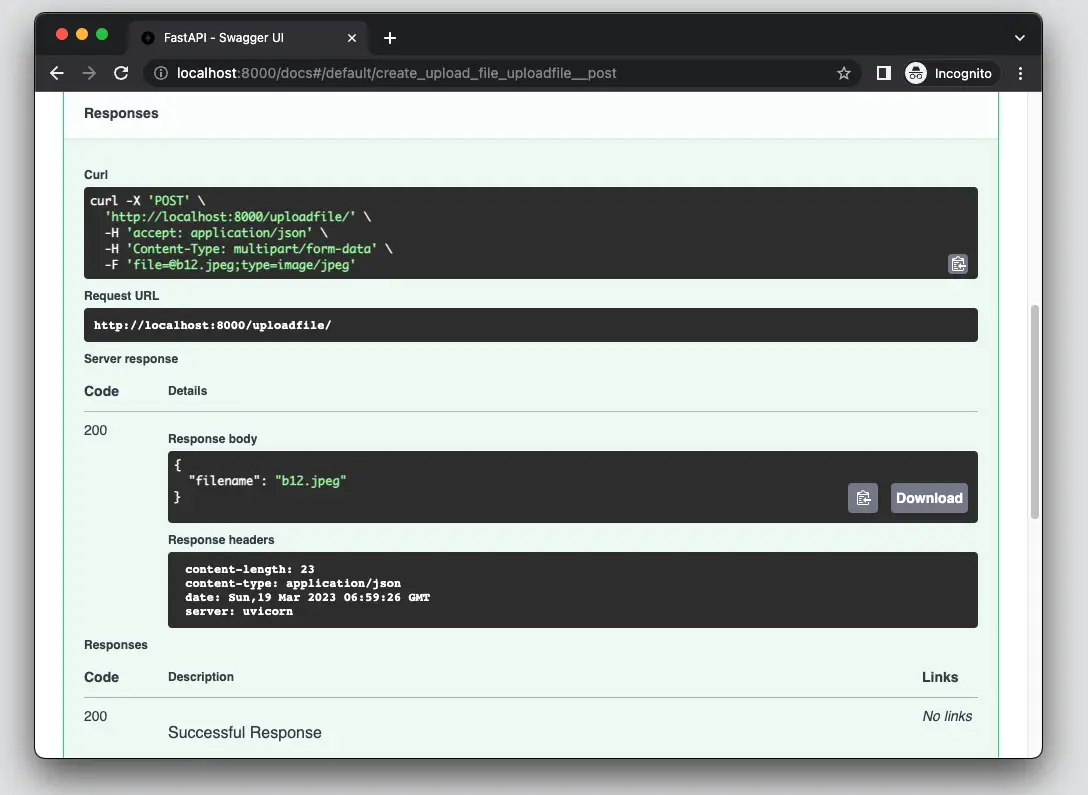
Select a file then click the Execute button (the blue one):
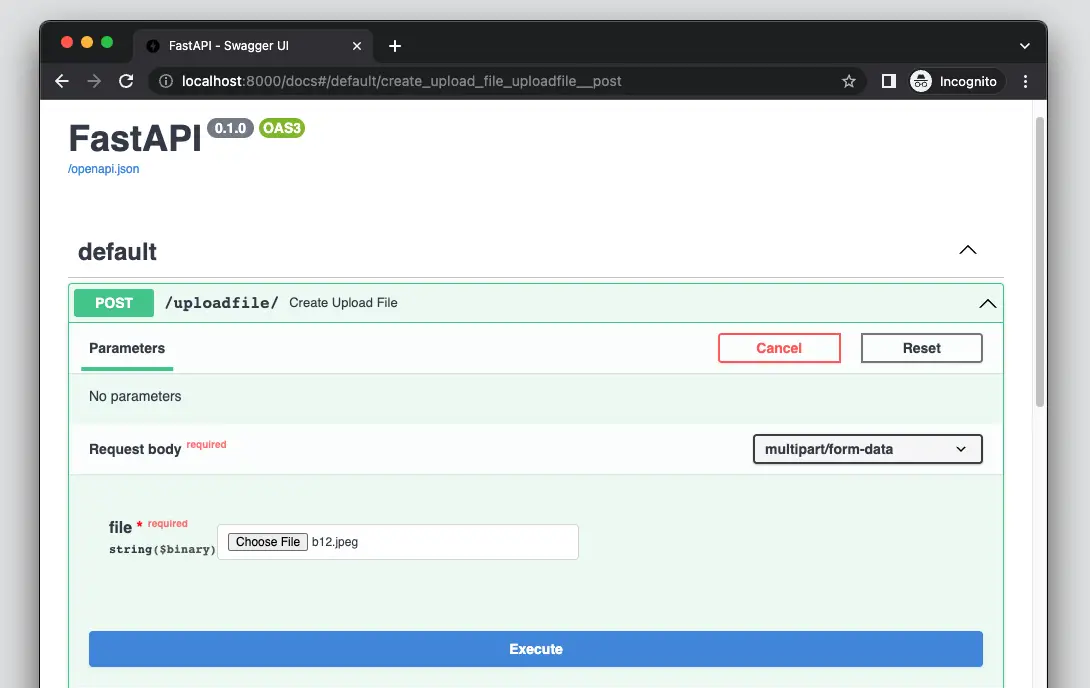
You will see the name of your uploaded file as well as the status code 200. That means it works properly.
Validating Files (Size, Type, etc)
Normally, for security reasons as well as to prevent our API from being abused, we will restrict users to only upload certain file formats with a size that does not exceed a certain level. In the example below, we will add validation logic to accept only image files smaller than 2MB in JPEG, PNG, and GIF formats.
The code:
from fastapi import FastAPI, File, UploadFile
from fastapi.exceptions import HTTPException

app = FastAPI()

@app.post("/uploadfile/")
async def create_upload_file(file: UploadFile):
    # Get the file size (in bytes)
    file.file.seek(0, 2)
    file_size = file.file.tell()

    # move the cursor back to the beginning
    await file.seek(0)

    if file_size > 2 * 1024 * 1024:
        # more than 2 MB
        raise HTTPException(status_code=400, detail="File too large")

    # check the content type (MIME type)
    content_type = file.content_type
    if content_type not in ["image/jpeg", "image/png", "image/gif"]:
        raise HTTPException(status_code=400, detail="Invalid file type")

    # do something with the valid file
    return {"filename": file.filename}
Now go to the built-in interactive docs of your app and try it out.
Storing Files on Your Server
Usually, if the uploaded files are okay, we will store them on our server. To do so, we can use the aiofiles module (you can also use an external threadpool if you like) to write the file contents to your desired location.
Example:
# main.py
import os
from fastapi import FastAPI, File, UploadFile
import shutil

app = FastAPI()

@app.post("/uploadfile/")
async def create_upload_file(file: UploadFile):
    upload_dir = os.path.join(os.getcwd(), "uploads")
    # Create the upload directory if it doesn't exist
    if not os.path.exists(upload_dir):
        os.makedirs(upload_dir)

    # get the destination path
    dest = os.path.join(upload_dir, file.filename)
    print(dest)

    # copy the file contents
    with open(dest, "wb") as buffer:
        shutil.copyfileobj(file.file, buffer)

    return {"filename": file.filename}
Now test it on your own with the built-in Swagger UI of FastAPI.
Conclusion
You’ve learned how to upload, validate, and store files in a FastAPI application. These are essential and indispensable skills when building modern backend systems. If you have any questions related to what we’ve discussed, just leave a comment. We’re happy to help!
